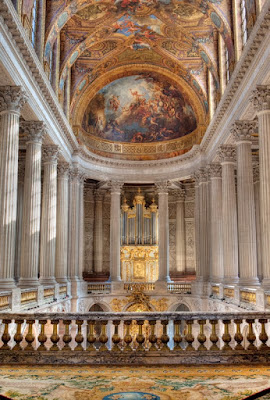
One of the challenges when capturing images inside buildings like the palace lies in the huge range in tones one encounters. The difference in brightness between the brightest sunlit highlights and the darkest shadows is enormous, way beyond the daynamic range of even the most sophisticated DSLR. This issue not only affects the camera used to capture the image, it also affects the display an image is viewed on or the printer used to record it for posterity. The human eye also has a limited dynamic range (not as limited as our trusty electronics) but the brain plays a remarkable role in seamlessly processing detail in shadows and in the highlights as the eye continuously adjusts the amount of light it admits. cameras, displays and printers clearly cannot do this!
A great approach to dealing with wide dynamic range situations is a techniques called High Dynamic Range (HDR) image creation. An HDR image is really a mixture of three or more images at different exposure levels (optimal exposure, under exposure and over exposure) The idea here is that the underexposed image reveals details in the highlights that would otherwise be lost while the over exposed image reveals hidden detail in the shadows. A piece of software takes these differently exposed images and maps their details into the the dynamic range of a single image. in other words, you end up with a picture that has the best representation of detail right across the dynamic range in the original scene, albeit squashed into the range of darks and lights that can be rendered on your PC's display or with your printer's inks.
There are a number of different tools available for creating HRD images, Photoshop has one built in. I like Photomatix Pro but as I said, there are many available. The standard approach with all of them involves providing three or more differently exposed images. Now the optimium way to do this is to capture three different images using a tripod mounted camera. the problem is, when you're walking around a major landmark with several thousand people, it's not always possible to take the time required to set your equipment up and a single hand held shot is all that is available. Never fear! As long as you shoot RAW, all is not lost and this is where the cheat comes in.
RAW images contain a great deal of detail. As such it's possible to reproduce the effect of over and under exposeure pretty accurately through your RAW conversion programme. I'm using LightRoom but the same process is available in all RAW converters. Simply set the exposure value in the converter to -1.5 stops, 0 stops and +1.5 stops and save these as three separate .tiff files. These files can then be loaded into your favourite HDR image generator and a final image created. I'll cover the actual technique used within the HDR tool in another post but for now, the results can be seen below...


Great article. Thank you very much for sharing it.
ReplyDelete